
Exploring ‘Attack Simulation Training’ in Microsoft Defender for Office365

User awareness can prove has proven to be a very critical aspect in securing the people and eventually organizations from a cyberattack. Sometimes, what we think is least important proves to be the most essential and even foundational construct to help in what we are trying to achieve. So, if you are trying to achieve a safe infrastructure and a secure perimeter around it, ‘User Awareness and Training’ should be your first goal after implementing the necessary security tools in defense.
Now, there are obviously many 3rd party vendors that provides the service where your users will receive an ‘almost’ legitimate looking email that may trigger them out of urgency, emergency, excitement, greed and many other ways to CLICK on that one link which will literally give them a LESSON! A lesson not to click on any links and/or attachments that either comes from unknown sources or seems ‘too good to be true’!
What is Attack Simulation in MDO?
So, it literally does what it says! It will simulate (or enact) an attack for you so that you learn the lessons and make it LESS LIKELY to happen in real. If we go by the official definition:
‘In organizations with Microsoft Defender for Office 365 Plan 2 (add-on licenses or included in subscriptions like Microsoft 365 E5), you can use Attack simulation training in the Microsoft 365 Defender portal to run realistic attack scenarios in your organization. These simulated attacks can help you identify and find vulnerable users before a real attack impacts your bottom line.’
I purposely took the whole para from the documentation so that you can get some additional info (the license) that will prevent you from referring other sources. Makes sense, right!
Categories of Attack Simulation:
Now, that we know what it does, let’s understand what can we make it do! There are a number of simulations that MDO offers with a great flexibility of designing the payload and make it as legitimate and tempting as you want. The categories that it targets are:
1. Malware Attachment & Link to Malware:
Ø I am covering these two techniques in one point as the only difference between them is the ‘type’ of payload. An attacker sends an email message containing an attachment and/or an attachment containing a URL (link to malware). Once the recipient clicks on either of them, an arbitrary code, like a macro or PS script, is run on the machine, the code is run and the malware is installed on the device.
2. Credential Harvest & Link in Attachment:
Ø Same as the previous one, these two categories only differ in the type of payload they use to phish the recipient. The link that is received in such techniques usually takes the users to a malicious yet legitimate looking website (obviously to establish trust with the user, example a Microsoft login page) that asks them for their credentials to sign in. Need I say more, what happens next?
3. Drive-By-URL (Watering Hole Attack):
Ø This is an interesting technique where the payload is the same old URL but what that link does is when clicked upon, it runs some malicious code in the background either to install applications or to exfiltrate sensitive data. The landing page where the link takes you is usually either a clone of a legitimate website or a compromised one!
4. OAuth Consent Grant:
Ø The same old beloved URL is again being used in this technique but now through a different way. This time the attacker sends an email from a malicious Azure application that is designed to gain consent or access to data. When clicked upon, the application using its consent granting mechanism will be able to get consent for critical aspects, let’s say, the user’s inbox or SSO consent etc.
How to create ‘Attack Simulations’!
Now that we know of the exciting categories, let’s deploy a simulation attack on our users. For this blog I am choosing the ‘Drive-By-URL’ technique. Now skipping the basics, that everybody knows, let’s come straight to the point:
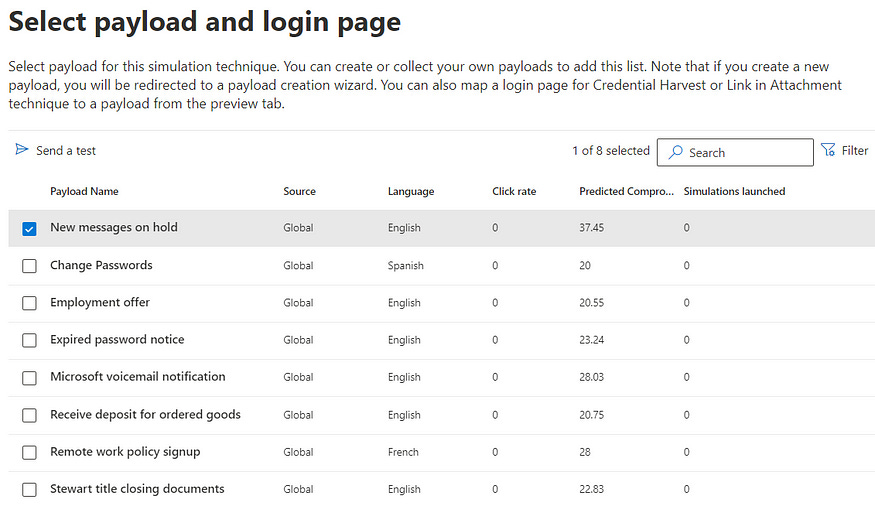
Once you click on ‘Launch a simulation’, select your desired category and name it, you can select from a number of pre-designed payloads within that category as shown below:
2. Don’t worry, you don’t need to only choose amongst these. You can create and modify any of the templates by following the below path:
Email & collaboration > Attack simulation training > Content library tab > Payloads
3. Search for your favorite template and click on ‘Copy Payload’ from where you can edit almost any aspect of the payload to make it more realistic and relevant as you need.
4. Once the payload is selected, you can define which users should be targeted with this simulation. I wouldn’t recommend sending one simulation to all the people across your organization because in this way, you will not be able to (safely)phish everyone across the organization.
5. Simulations should be chosen and designed as per the relevant workstream (such as developer, admin, manager etc.) and/or the industry being catered by the various employees so that the payload can make more impact to the recipient and tempt them to click on the link or attachment.
6. Even if you had chosen ‘All Users’ in the previous step, you can exclude a few due to various reasons in the next step.
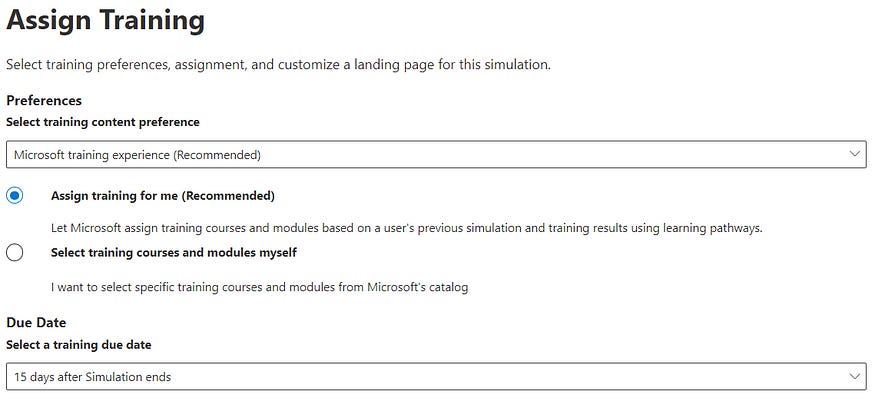
7. Now comes the important part, ‘Training’. MDO gives you a lot of options to choose from here as well. You can choose the due date of the training completion as well as decide if the user should choose their own learning module or should Microsoft recommend one for them. Even if you have a 3rd party custom training site, you can direct your users there as well, just click on the dropdown menu under ‘Training Content Preference’:
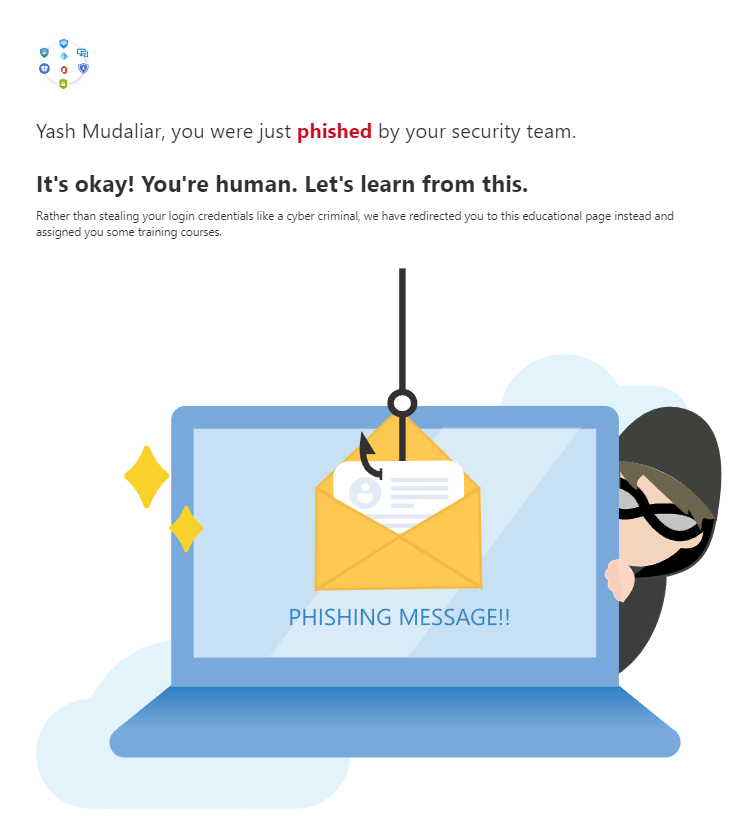
8. It’s time to now choose from pre-built (but customizable) landing pages. Once the user clicks on the spoof link, they are redirected to a page from where they can get started on the training. You will now need to decide amongst the built-in landing page templates and customize it to make it look familiar to your employees, example adding your company’s logo ( as I did) instead of Microsoft’s. I personally loved this one:
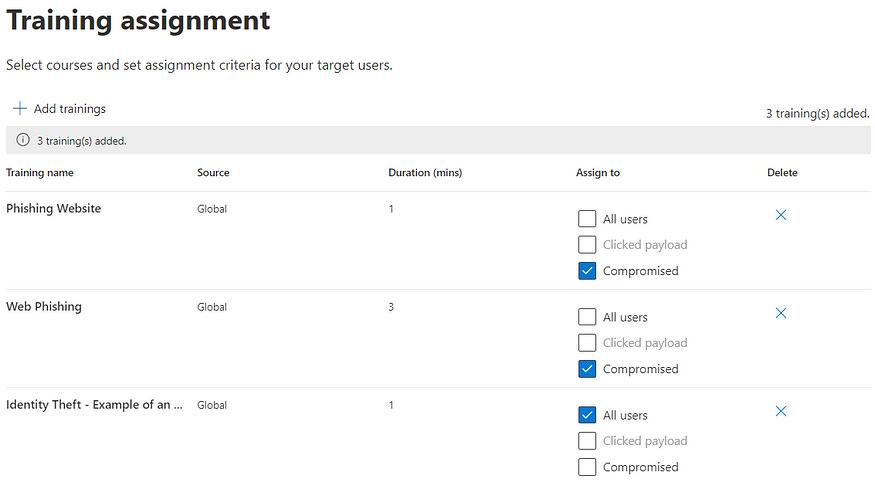
9. Once done, the next part is to assign trainings (if you chose Microsoft training). Depending on the type of technique you used for simulation, choose from the library on what trainings would you like your users to complete. You can even decide if ‘All’ or only the ‘Compromised’ users should go through the training. I have chosen some relevant ones as below:
10. Now for the users are already aware and smart, they can report this as a phishing email and you can define how that notification can look like, whether it should be the default one or you want to make changes there!
11. Similarly, you can design the training assignment and reminder notifications as well. Don’t forget to define the delivery preferences and frequency of notifications.
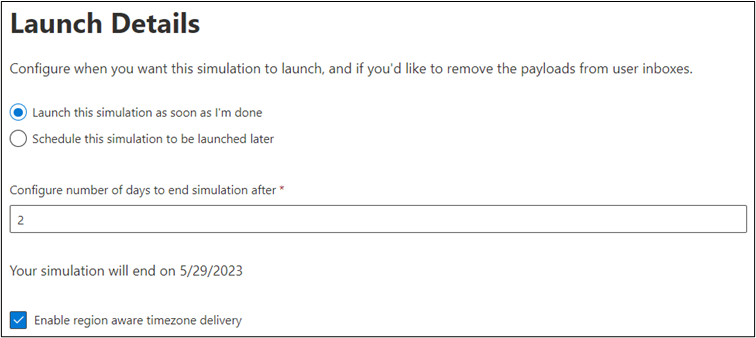
12. We are almost done now! In this step you can decide whether you want to launch this simulation as soon as you end designing it or you want this to trigger on a special day or date. A feature I personally love is to make all these arrangements as per the user’s region, so don’t forget to click the checkbox if your organization is spread globally.
13. & that’s it, we have officially deployed a attack simulation for our users.
Now, if you want me to blog about the results and how to analyze them, please comment on this blog or reach out to me on LinkedIn.
Also, please share your thoughts on this blog, whether positive or negative, so that I know you have read through it.